KIP 2012

KIP 2012

Wednesday, February 23, 2011

Lesson 3 - Fairisle and Intarsia

Fantastic lessons today.  Everyone a great time, charting patterns for a sample of both fairisle and intarsia techniques, then knitting them.  Most are still a work in progress, but one or two finished small examples.  Fairisle is when the wool is carried across the back of the work as you knit a repeating pattern.  Intarsia is used for a separate picture or pattern in an expanse of plain colour.

Here is the email people on the course have received:  Hi knitters!
Quite a challenging lesson this week.  Remember to pre-plan.  Use graph paper (knitters graph is wider than it is long, but you can use maths graph.  Just remember that the finished article will be slightly different).  Scroll to the bottom of this page to see knitters graph paper.  With both techniques, there are some important points to remember:
·         Very simple patterns are often the most effective
·         Very contrasting colours look great
·         Always carry the strands of different colours over the top of the previously-used colour
·         Consider writing your pattern out as numbers, rather than working directly from a graph
·         Use stocking stitch
·         In fairisle, twist yarn around that you are using every 2 or 3 stitches
·         Keep your work very loose
·         If it starts to annoy you – have a break!
We realised that intarsia is for decoration, but fairisle, because it doubles (or more) the thickness of the knitted piece, is a way of making clothing warmer.
The next two lessons will concentrate on crochet, including Tunisian, with an emphasis on both squares and flowers.  We’ll have some fun and be able to finish items quickly, with elements being able to be combined to make larger works.
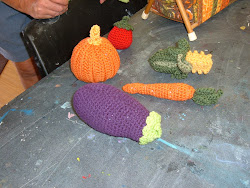
Some beautiful and fun work happening already – the bags some of you have made are gorgeous, and Edith has brought along a cute little container with a lid she made, using plarn from bread bags!  Excellent.  Gillian and Sally are going great guns with their sea creatures and others have all sorts of things happening.  Scroll down to see new photos to the right.
Keep up the good work during the week, although  remember, if it’s not fun, do something else!

Thursday, February 17, 2011

Some thoughts

This is some info I sent out as an email to those on my courses, and others interested.
*  Fantastic lessons this week - everyone is so enthusiastic.  Great to see.
I have a list from each group of things - patterns, books, etc - to bring to the next sessions, so I'm busy finding those.  

The attachment today is an outline of how to make yarn from t-shirts [SCROLL DOWN TO THE BOTTOM OF THE PAGE FOR THIS] - I know the demonstration was a bit rushed and you may not have had a chance to give it a go yourself, so here's the run-down.  It's a great way to use up old t-shirts!  If you experiment a bit, they're all different weights, so it can be a challenge to knit or crochet, but also quite effective.  

I have been knitting with some t-shirt yarn and it has really highlighted a flaw in my technique!  I obviously push the point of the crossing needle with the tip of my left thumb - ouch!  It's very bruised and sore today.  Think I'll put that aside and try wool for a while.

Thanks for your thoughts on the exhibition - I'm still open to new ideas!  Will be meeting with 2 different groups of school children next week and I plan to base what they do around the basic square.  I'll share my ideas with you next lesson.

Our next lesson is Fairisle and Intarsia.  These techniques are ways of making patterns, pictures, etc in your knitting.  You will be knitting a small piece to highlight each of these techniques, but first - you will be using knitters' graph paper to plan your piece.  It's a lot of fun, and I find I tend to knit quicker when I'm doing this as I want to see the effect as it grows and changes.

Have a great week and I'll see you on Wednesday!
Jennifer
Knitcetera

Wednesday, February 16, 2011

Lesson 2 - Recycling

Today's was the first full-on lesson.  The morning group enjoyed some of the recycling ideas, although they are mostly doing their own things.  Some beautiful work coming along here. Jennie's hats are great - so different.  Must get some photos.
Barbara and Sian have been working on pieces of what will become a very long scarf - looking good.  Again - I must remember my camera each week.

 In the afternoon, all got right into the recycling session.  We made "plarn" - plastic yarn out of shopping bags and some pretty coloured kitchen tidy bags Sian had found at the local $2-type shop.
Check out this 2min 30sec YouTube clip on how to make plarn: http://www.youtube.com/watch?v=hdTm2V4ssvY
  Some beautiful work happening here - all are using different colours or colour combinations and it's amazing the variety we're seeing.  Photos soon - There will be a real range.  We had some hilarious conversation about the things we could make from plarn, although at the moment we are sticking to the bags!  (Anyone for plastic pants?)  We did think they'd be very useful for school swimming stuff.  Must make sure we're not using bio-degradable plastic - I think it's made from cornstarch - very annoying!
The pattern says to use size 13 & 15 needles, but we found the best size is about a 5 or 6 mm.  Some of the evening group had some difficulty with cutting the strips a bit narrow so they kept breaking, and a couple found it just so much easier to crochet than to knit.
Lots of variety here, with Keitha choosing to make a smaller bag (cute), or others just a sample square.  It'll be interesting to see what turns up next week!

I demonstrated cutting t-shirts into continuous strips to make a knittable yarn, and again someone tried crocheting and found this very effective, although we will need a lot of t-shirts!  Luckily the local op shops have cheapos - must make sure I get along to the "fill a bag for $1" days.  Click here for a tutorial on making t-shirt yarn.  Such fun!  http://www.craftpassion.com/2009/05/recycle-tutorial-making-of-t-shirt-yarn.html

We had some great "show and tell" - have to get a photo of Sian's incredible bag for our exhibition raffle - just brilliant.  And Robyn has made a piece to hang on one of our trees, inspired by the sunset over Orewa estuary - lovely.  Barbara and Jennie's hyperbolic crochet pieces will be added to the Seagardens Aotearoa exhibition next week.

We also discussed more ideas for the exhibition and people are making good use of my library - I now have around 200 knitting and crochet books.  I am working on siting them at the Arts Centre so they are more accessible.

WE ARE HAVING FUN!!

Saturday, February 12, 2011

Learning

I have been alerted to this article:  about the benefits of knitting.
So true!  The article references the Shetland Isles - I'm sure I read somewhere that the cancelled classes are being reinstated due to to public concern (call that 'uproar'!) However, in reading through submissions in the public consultation regarding the possible closure of some small local primary schools, knitting has featured, but there is a subtle shift away from its recognition as a traditional need in terms of educational value, with some people asking for funding to come from the arts rather than education.  Sadly I think this is not resolved and will see some protracted discussions before it is.  Meanwhile, traditional knitting is not being taught in a number of the schools.

On the home front, I have sent an email to the teacher at the local school who contacted me last year about her lunchtime knitting & crochet group, so I expect to be visiting them soon.  In preparation for that I have ordered some dinky knitting needles designed for children.

Thursday, February 10, 2011

The Course

Although each course is different as it is an organic thing - evolving and changing in response to the individual needs of the people who attend, this is the basic outline I have designed for term 1, 2011.

The main focus for each session is in bold. This is intended as a basic outline - session content may vary depending on individual needs of preferences.

Lesson 1: Welcome and introductions. Outline course and exhibition. Report on progress to date. Copyright. Video clips - knitting; yarnbombing; knitting as art. Floor plan of the Art Centre and overview of ideas to date for the June exhibition.

Lesson 2: Recycling. Using t-shirts, plarn (plastic yarn we will make using plastic shopping bags) and other reusable fibres. Sharing ideas for additions to the exhibition, we will fill in a table of who will do what, where and when. A guide only - this needs to be fun, not work!

Lesson 3: Intarsia & Fairisle. An explanation using examples of the difference. Making our own pictures - designs using graph paper. Trial samples, including gauge samples. Ideas for the future.

Lesson 4: Crochet & Tunisian Knitting. How to. Examples. 'Seagardens Aotearoa'. Review of progress to date. Using various tools, sizes and variations. Finding your comfort zone. Right and left-handed work.

Lesson 5: Flowers, stems, brooches. Other embellishments. i-cord. French knitting. size variations. A range of fibres and materials.

Lesson 6: Scarves. From easy to very complicated - crochet, circular needles, etc. Chevron, ribs, moebius, cables, entrelac.

Lesson 7: Joining pieces. UFOs - unfinished objects. (Everyone has them!) Various methods. Overview of progress towards exhibition. Finalised timeline.

Lesson 8: Double-up and other 'different' forms of knitting. A bit of fun. Also, yarn bombing/storming in the Western Reserve - an expedition. Also, start to record vignettes of finished work for the exhibition.

Lesson 9: Easter patterns. Because we can! Chicks, eggs, etc. Show and tell re exhibition pieces. Identify gaps.

Lesson 19: Final session for term 1. A wrap up and review of the past term's work. This session will be on 13th April.

What do you reckon? Are we having fun, or what?

Starting ...

Hi all
Today marks the start of this blog about the fun and adventures of 'Knitcetera'. I am an avid knitter, convenor and teacher of groups of knitters young and old in and around Orewa, a small seaside town north of Auckland, New Zealand.

Wednesday 09th February 2011 saw the start of several classes at the Estuary Arts Centre, Orewa. Classes will be held in ten-week blocks there each Wednesday, the first at 9.30am til 11.30am, the next at 12.30pm til 2.30pm and the third will start at 7pm and end at 9pm. People may attend any of these sessions - I will be teaching the same theme each day to each of the three classes.

This week saw an introductory session where I outlined the background to these courses, handed out a course outline and showed pictures and video clips of things knitting - especially some wonderful, fun ideas from YouTube.

I have been granted funding to pay for hiring the Estuary Arts Centre for the whole of June this year to mount the KNITCETERA exhibition, and planning for this started in my 2010 classes. Early this year I placed an advertisement in our local community newspaper and received application from over 30 people! To date now there are 22 people for the daytime classes - I am leaving it to them to attend whichever they wish - morning or afternoon - and there are 10 enrolled for the evening group. So exciting!

The two groups are quite different - those in the daytime seeming to be more socially oriented, with those in the evening more keen to learn new skills. Time will tell!

More later - I will post regularly, including the course outline and ideas, details of the lessons and our planning and progress towards the exhibition.
:)

Irish Hiking Scarf

Irish Hiking Scarf pattern

approx. 350 yards of worsted weight yarn
size 8 US needles and a cable needle or one double pointed needle
(Feel free to use chubbier yarn and/or larger needles to make a giant scarf. It will look just as lovely!)
Finished size, approx. 5 ½” x 55”
Cast on 42 stitches.
Row 1. (WS) K2, P2, K2, P6, K2, P2, K2, P6, K2, P2, K2, P6, K2, P2, K2
Row 2. (RS) K4, P2, K6, P2, K2, P2, K6, P2, K2, P2, K6, P2, K4
Row 3. (WS) repeat row 1
Row 4. (RS) repeat row 2
Row 5. (WS) repeat row 1.
Row 6. (RS) repeat row 2.
Row 7. (WS) repeat row 1.
Row 8. (RS) K4, P2, C6F, P2, K2, P2, C6F, P2, K2, P2, C6F, P2, K4
Repeat these rows to desired length, ending on row 7. Bind off.
Key:
C6F = Slip 3 sts. onto a cable needle and hold to front of work. K3, then K the 3 sts. off cable needle.
All content and photos are © Hello Yarn. All rights reserved. These patterns are for personal and non-profit use only. This means you can knit for yourself,
for a gift, for charity, or for a charity auction/sale. You can print out the patterns for friends, if you wish, as long as you print straight from my site so the
copyright information is intact. You may not sell items made from these patterns for profit or give these patterns away in your store to sell yarn.
Visit www.helloyarn.com for more patterns.
Photo courtesy of Allison Gray. You can visit her at http://kniterrant.blogspot.com

Seagardens Aotearoa

Large Seagardens Aotearoa piece


FOR THE EXHIBITION

FOR THE EXHIBITION
Edith's veges


Detail of Gillian's seascape

Christine's stilt

Sally's work

Edith's toadstools

Well done Christine!

Kaywin and Jan's bunting

Scarecrow

Jennie's roses

Elaine's birds made with sock wool

Gillian's monster flower

more fruit from Sally

Sally's veges

Gillian's starfish -back

Edith's fish

Sally's dolphin

Sian's flower

Gillian's paua

Robyn's sunset-inspired piece

Robyn's sunset-inspired piece

Jennie's hats

Barbara T's crochet